
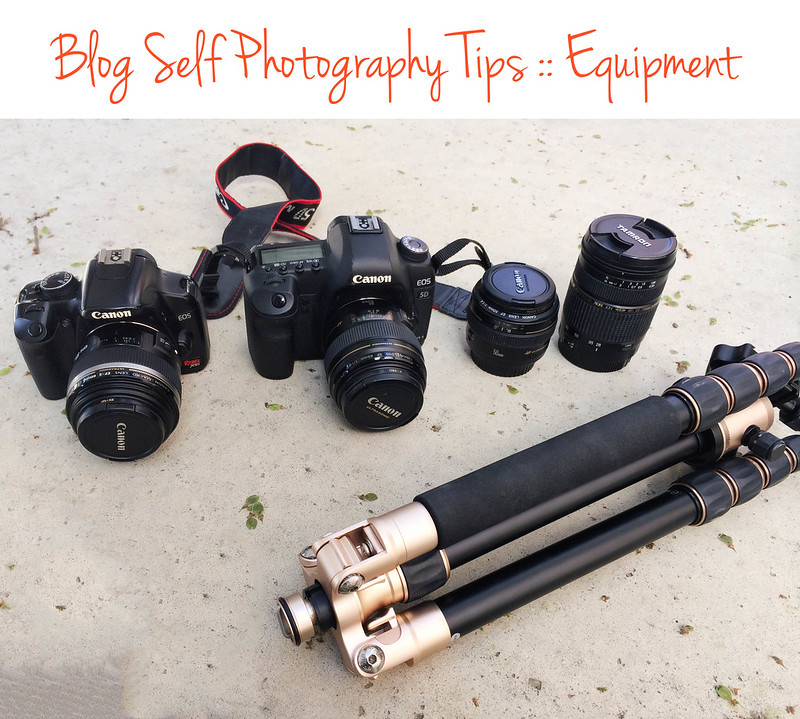
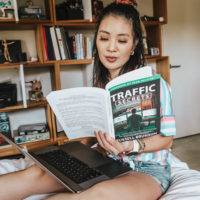
Choosing Equipment / What I Use:
- Camera
-
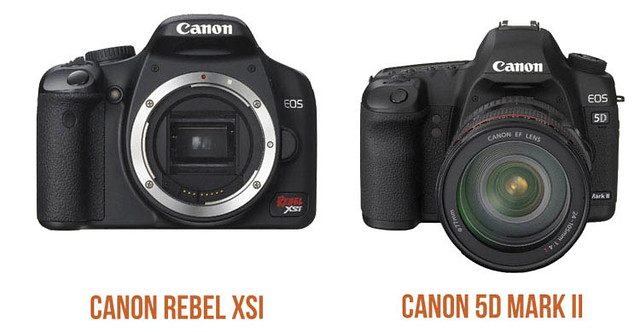
Canon Rebel XSi (buy) – This was my first DSLR camera bought nearly 10 years and one that I have fond memories of. I used it exclusively for about 2 years before upgrading to the Canon Mark II 5D. The Canon Rebel is a great entry-level DSLR camera that I would highly recommend if you’re still using a point-and-shoot. The quality is amazing, it’s easy to use, and it’s a great value for your money. The current models even shoot video so it’s a big win in my book! The newer T3i models even include video with a screen that flips backwards — a great option to have if you need a video camera too.
-
Canon 5D Mark II (buy) – This is the camera I use 99% of the time now for cute & little. I upgraded to this camera after blogging for 1.5 years and wanted to try a camera with a full-frame sensor (read this for a basic run-down of full-frame vs. crop-frame differences if you’re interested). While it was quite a big investment, I have to admit that the different is beyond comparison and I just can’t go back to the Rebel for day-to-day pictures anymore. Canon actually released a newer 5D Mark III camera after I bought my model with additional features, so do look into that!
-
Sony NEX 5R (buy) – I don’t own this camera, but I know of a few bloggers who use it with great results (check out Christine’s beautiful blog pictures!). This camera has the form factor of a smaller point-and-shoot camera while still allowing you to interchange lenses like the bigger DSLR cameras. This is the kind of camera that I could have on my at all times — just as small/lightweight as a camera phone but creates results like that of a traditional DSLR.
=> Bottom line: I can’t recommend enough the benefit of investing in a DSLR camera! Being able to swap out a nicer lens will create an unbelievable improvement in picture quality that is worth the investment as you’ll learn to use it outside of the blog for just capturing your life’s moments as well.
- Tripod
-
Mefoto Travel Tripod (buy – I have the gold color) – When choosing a tripod, I look for one that is lightweight, portable, and easy to set up. I actually just upgraded to this tripod in January as my previous tripod wasn’t able to support the weight of my bigger camera lenses very well and was unstable in windy conditions. This Mefoto travel tripod is sturdy enough to support even heavy telephoto lenses yet still lightweight at only 2.6 lbs. Another feature I look for in tripods is a quick way to get my camera secured on and off. This Mefoto tripod has a quick-release plate and I just leave the plate screwed onto my camera so that when I’m ready to take pictures, it doesn’t take more than 5-6 seconds to get set up!
=> Bottom line: Find a tripod that’s versatile enough for all of your shooting needs and is easy to set up / tear down.
- Camera Lenses
-
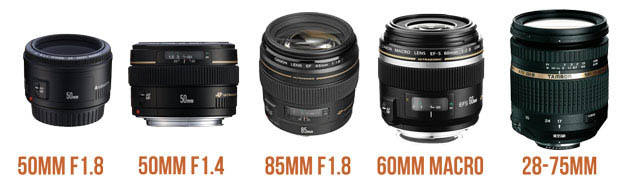
50mm f1.8 lens (buy) – This was my first lens that I used for almost the first year of my blog. Dubbed as the “nifty fifty”, it’s an affordable lens that is also easy to work with. I actually sold this lens when I upgraded a couple years ago to the 50mm f1.4 lens but I would highly recommend this lens to those who are first starting out and just testing the waters.
-
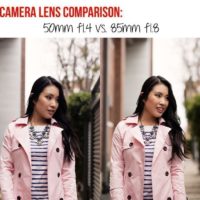
50mm f1.4 lens (buy) – When I was starting to get the hang of DSLR photography, I sold my 50mm f1.8 and bought the 50mm f1.4 lens. This lens is significantly more expensive, but the quality is significantly better! Not only do you get crisper picture quality, but also a better bokeh. Here’s a great quick video comparing the 2 different 50mm lenses if you’re interested!
-
85mm f1.8 lens (buy) – I’m partial to fixed lenses and use this 85mm f1.8 for all of my outfit pictures. The 85mm f1.8 simply has the best depth-of-field results while still picking the correct object to focus on when using the remote. I personally started with the 50mm f1.8 lens and then moved on to the 50mm f1.4 lens, but neither of them compare with the 85mm f1.8 lens as far as background blur and photo quality is concerned. While the 85mm f1.8 lens requires a little more finesse as far as self-photography is concerned, the results are worth it!
-
60mm macro lens (buy) – I use the 60mm macro lens for all my beauty posts and occasionally for up-close detail photos of my outfits (although generally I just don’t time to switch lenses mid-shoot). The 60mm macro lens is also an incredible lens if you ever need to do close-up pictures that require clear focus of small details. I bought both of these lenses on Craigslist and I would recommend you set up a Craigslist alert (using something like NotiCraig) to find a deal!
-
28-75mm f2.8 lens (buy) – This lens is definitely not essential for my blog as I never use it for outfit pictures. But, for when I’m at blogging events or out in a crowded space, this is the lens I use. I bought a Tamron lens in this case as it had glowing reviews and cost only 1/4 of the comparable Canon. This lens is touted as the “King of the Walk-Around Lenses” and it definitely lives up to that name!
=> Bottom line: If you’re doing full-body outfit pictures, start with the 50mm f1.8 lens and work up to the 50mm f1.4 and the 85mm f1.8. If you’re doing closeup pictures and need lots of clear detail like for makeup/beauty, consider investing in a good macro lens like the 60mm.
- Camera Remote
-
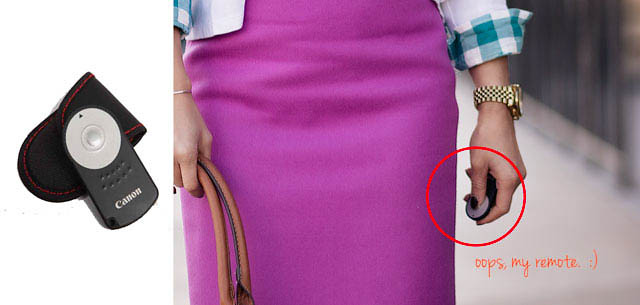
Canon RC-6 Wireless Remote (buy) – Obviously you want to buy a remote that is compatible with your camera. For Canon camera users, I highly recommend this one! I love that it has a 2-second delay feature (in addition to a 0-second delay option), which lets me hit the trigger button and have a 2-second pause before snapping the photo. Those 2-seconds are just enough time for me to re-position my hand that’s holding the remote as well as set myself up to look more natural. You’ll want to find a remote with a decent enough range and at 16′, this one has worked well for me.
- Camera Storage
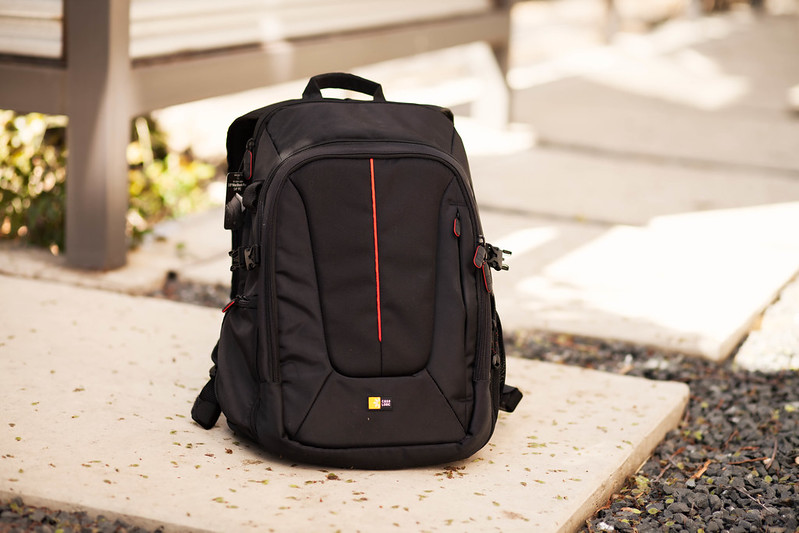
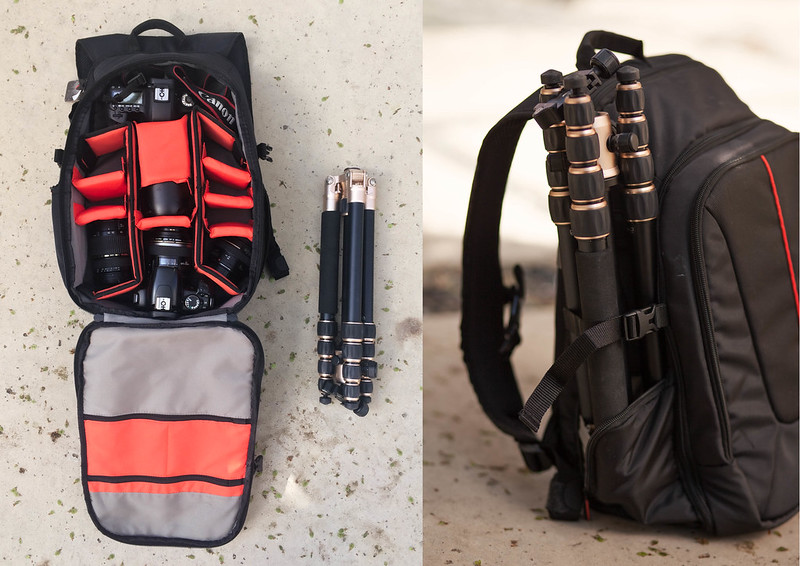
- Case Logic SLR Backpack (℅ – buy) – For the longest time I was just lugging around my DSLR camera in my purse and sometimes I would just have it sitting on backseat of my car (so unsafe, I know!). I finally decided that given all of my gear, I needed to have a better way to safely store and transport it. This Case Logic backpack has been absolutely wonderful and I love the fact that I easily access the camera without having to open the front flap all the way. The backpack style is also hands-free (perfect for a mom with her hands full) and is something that Adrian would be willing to wear too when we’re out on vacation.
Stay tuned for the next part in this self-photography series. I’m planning on covering different camera settings and what I find works best for me!

P.S. In case you missed it:
- Mint Stripe + Floral – Pretty pastels and soft colors!
- Giveaway – Enter to win a Skinue skincare sample pack.

I definitely keep my dslr in my handbag and my tripod in my car. it's just too difficult to transport an extra bag. But for other excursions I do see the value in a camera bag!
thanks for all the helpful tips on lenses, i'm still learning so this is great info!
xo, Nina
afterthe40barfinish
Thanks for the tips, Kileen!
Ok, so practical question- I think you mentioned that you take your pictures before you go to work in the mornings, so what do you do with your giant backpack with thousands of dollars of equipment in it? I get nervous when I leave my camera in the car during the work day, even when it's safely hidden, and I'm parked in our parking garage. Do you carry everything into work with you?
And also another question, not trying to be rude but genuinely curious, if you have a 2 second delay on your remote, why is it always visible in your photos?
Hey Kimmie! I take my backpack into the office with me as I also pack my gym clothes in there and change after work. As for why my remote is always visible, I'm just not very good at hiding it. I'm trying to get better at it but I think I'm just in too much of a rush to get pictures done in the 5-
Sorry, last email sent too early. Was saying that I'm too rushed in the 5-7 min I have before I head into work to take pictures that I forget about hiding the remote. I'm already starting to think about work at that time and just trying to get these pictures done as quickly as possible. Hoping to get better at it though!
Ah, ok. Thanks for the response! Is your remote the type that needs a direct line of sight to your camera? I guess that would be kind of problematic to have to point-and-hide (I usually stick mine in my back pocket and then reach behind me to push the button and move my hand back to "look natural" though I still usually have awkward hands anyway).
And that's so much stuff to carry into work everyday! You are so dedicated, lady, but it's totally worth it because your pictures are beautiful. Can't wait to see the rest of the series!
Thank you so much for the tips Kileen… me quedo con la Canon 5D Mark II 😉
I forgot to mention that I leave the tripod in the car but you're right that it's still quite a backpack to carry. granted I usually only use just the 5D Mark II, I could probably keep the rest of the gear at home, but I've found that I've just too rushed in the mornings and don't plan ahead the night before to have all my necessary lenses with me when I do need them. The walk from my car to my office is really short though (it's really only about 100 m with a flight of stairs in there) so it's not too bad. 🙂
And my remote does requite line-of-sight, which is why I usually have to stretch my arm and bend a little in order for the remote to get picked up. I should probably look into getting a remote that isn't so finicky!
wow!! You sure have invested in your photography equipment's and it pays through your photos, because they are gorgeous!!! The 5D is on my list..but the price tag is daunting..will have to wait it out..thanks for sharing the comparison, it surely will help me make up my mind..
Thanks for sharing this post. It is very useful for enhancing knowledge.